Starting iOS programming with cocos2d
Learning to program for the iPhone or iPad probably seems daunting. You've heard rumors about Objective-C's steep learning curve. Where can you even start? Well, fear not. In this post I'll point you in the right direction to get you started with the tools that I currently use, Xcode and the cocos2d for iPhone framework. Yes, there are tons of other ways to write & publish apps, but this is what has worked out for me so far. When we finish, you'll have a template program running on a simulator on your Macintosh. From there, you can decide if the process was interesting enough to continue with.
The first step is to download Apple's iOS development tools. To do that, you'll need to register as an Apple developer. It's free, and gives you access to a bunch of technical documentation as well. Once you register and have your Apple ID, check out the iOS Dev Center. You'll be coming back to this site pretty often, so a bookmark might be in order. After you log in, you'll be able to scroll to the bottom of this page and download the most recent version of Xcode and the iOS SDK. Be warned, this is a hefty download (about 3.5 GB) so you might want to start it whilst at work or overnight. Once you get the disk image, you can install everything as you would any other program. All the developer tools will be installed in a /Developer folder in your hard drive's root.
Next, you'll download the cocos2d for iPhone framework. Go ahead and get the stable version. After that's finished downloading, unzip it into your home directory. Click the magnifying glass (Spotlight) in the upper right of your screen, and do a search for "Terminal." This'll give you a command line window that is opened to your home directory. Navigate into the cocos2d folder and install the cocos2d Xcode templates by typing the following commands:
cd cocos2d-iphone-0.99.4

sudo ./install-templates.sh
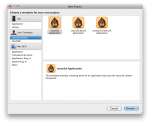
 (Note that your version of cocos2d may be different.) Now you can use Spotlight to find Xcode and start it up. When Xcode starts, you'll see a splash screen. Choose the "Create a new Xcode project" option, and choose cocos2d from under the "User Templates" header. Go ahead and create your project using just the regular cocos2d Application template. Once you've played around with the default template, you can go back and experiment with one of the two physics engines (Box2D and Chipmunk) included in cocos2d. Once you click "Create," the template will create a default program as a starting point for you. To try it out, click the dropdown menu on the far left, and choose "Simulator." You won't be able to test your app on a device until you've actually paid Apple for the ability to publish on the App Store. Kind of lame, but there it is. Then click the "Build and Run" button. Xcode will churn for a while as the app compiles, then a simulator window will pop up and you'll see a Hello World message, along with the FPS count.
And that's it! You've finished one of the arguably harder parts of learning any new type of programming — getting your environment set up. After this, you can look at tutorials and through the cocos2d forums to learn more about Objective-C and how cocos2d works.
Comments